Manuscript Tools
A free Google Docs side panel for figure numbering, citation checks, reference cleanup and clean PDF export.
A free Google Docs side panel for figure numbering, citation checks, reference cleanup and clean PDF export.
Manuscript Tools is a free side panel for Google Docs that handles the bookkeeping in a long manuscript or grant. You tag figures and tables as you write, and one click turns the tags into numbered legends and citations. It also checks citation order, cleans up reference lists, formats tables and exports submission-ready PDFs with every link removed.
Two files to paste into Google Apps Script, plus an MIT licence, about 96 KB. Installing takes about ten minutes and is done once. Everything runs inside your own Google account, and nothing is sent to the lab or to anyone else.
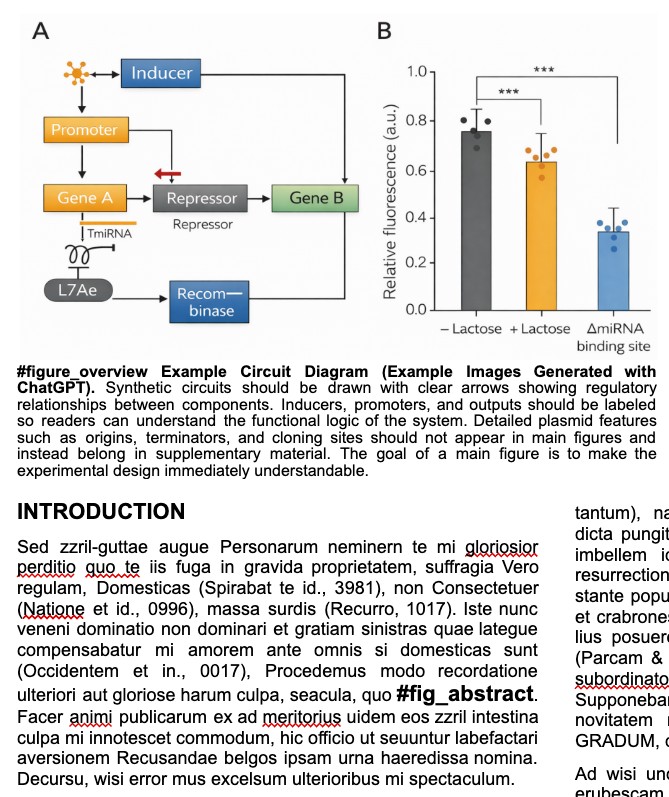
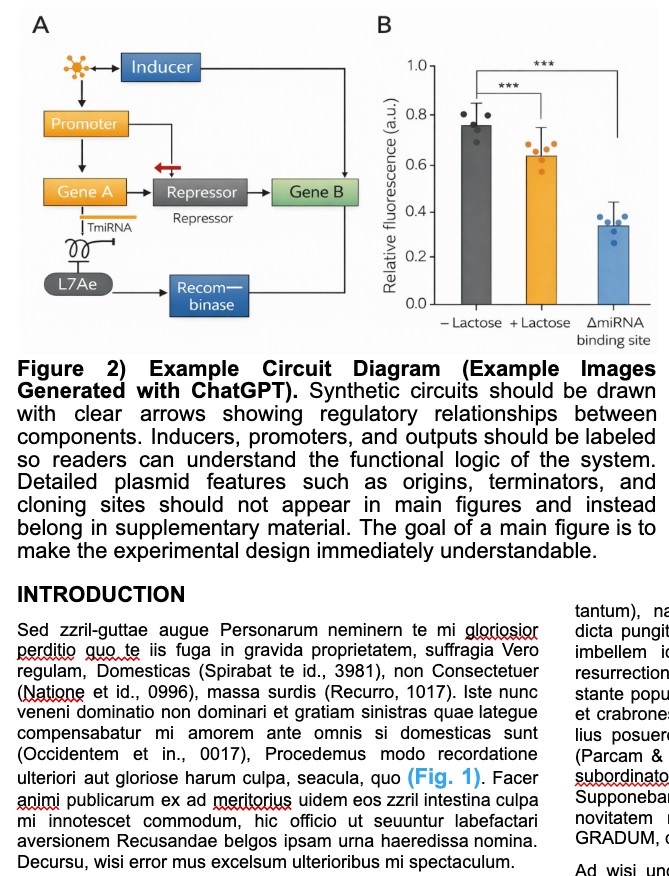
Grants and manuscripts go through many drafts, and the figures move almost every time. Renumbering by hand means searching the text for every citation of Figure 3 and hoping none were missed, and a single wrong figure number is the kind of error reviewers notice. With Manuscript Tools, figures are tagged by name rather than by number, so you can reorder, add or cut figures as often as you like, and one click renumbers every legend and every citation in the document.
The rest of the panel catches small problems before a reviewer does. It finds citations still linked to Paperpile, references missing a PMID or PMCID, leftover [Internet] and Available from: text, pasted superscript characters that will not typeset, and tables that do not match the rest of the document.
The export tools take care of the other recurring job, which is turning a Google Doc into the files a grant portal will accept. Many funders, NIH included, ask for the References Cited as a separate upload and restrict hyperlinks in the main attachments. Split Doc & References handles both in one step. It works on a copy, cuts it at the References heading, removes every hyperlink from both halves, checks that none are left in the document or the PDF, and saves the two PDFs in a [PDFs] folder next to your document. Your original document is never changed, so links, comments and citation manager fields stay intact for the next draft.
A full application has many parts, such as the Specific Aims, Research Strategy, Facilities, Equipment and letters. When each part is its own Google Doc in one folder, Export Folder to PDFs turns every document in that folder into a link-free PDF at once, ready to upload or send to your grants administrator.
You make your own copy of the add-on in Google Apps Script, Google's free scripting tool, and install it on your own account. It then appears in every Google Doc you open on that account. Use the account you write your papers with. Click any screenshot to see it full size.
Click the download button above and unzip it. You will paste in two
files, appsscript.json and Code.gs. Open each one
in a plain text editor such as TextEdit or Notepad when you need to copy
it.
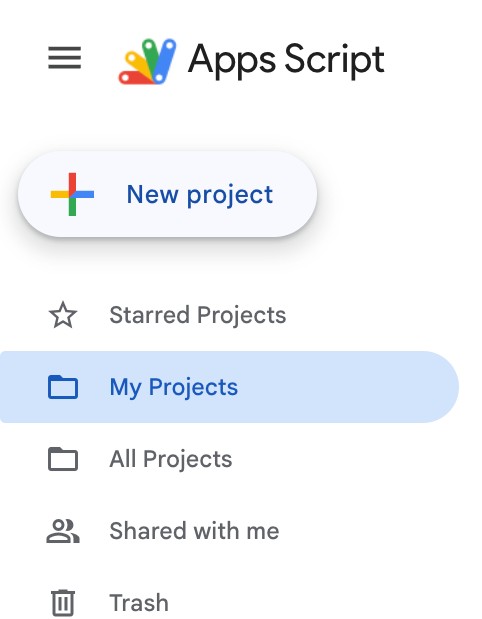
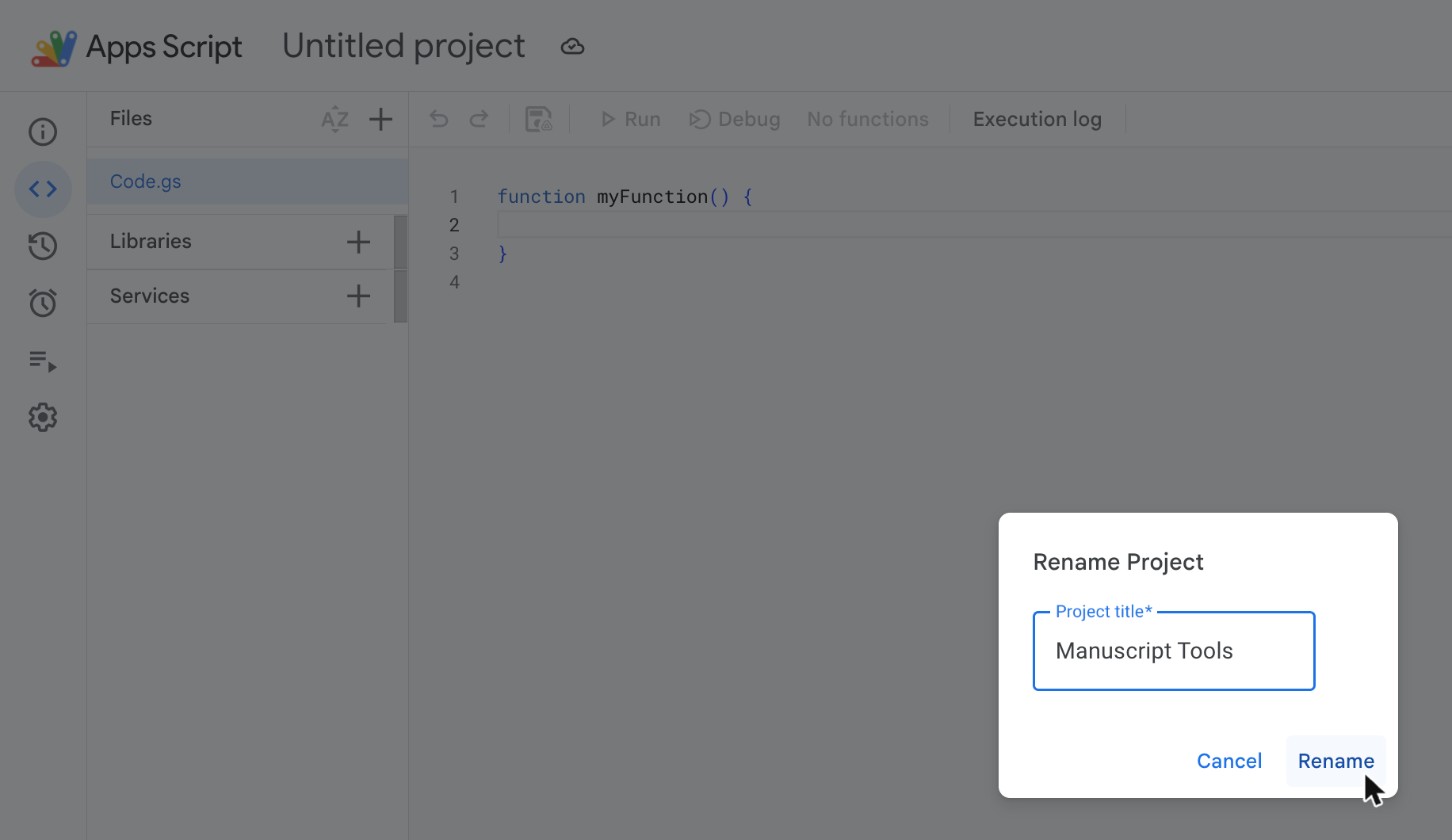
Go to Google Apps Script and click New project.
Click Untitled project at the top, type
Manuscript Tools and click Rename. This is the
name the panel shows in your Docs.
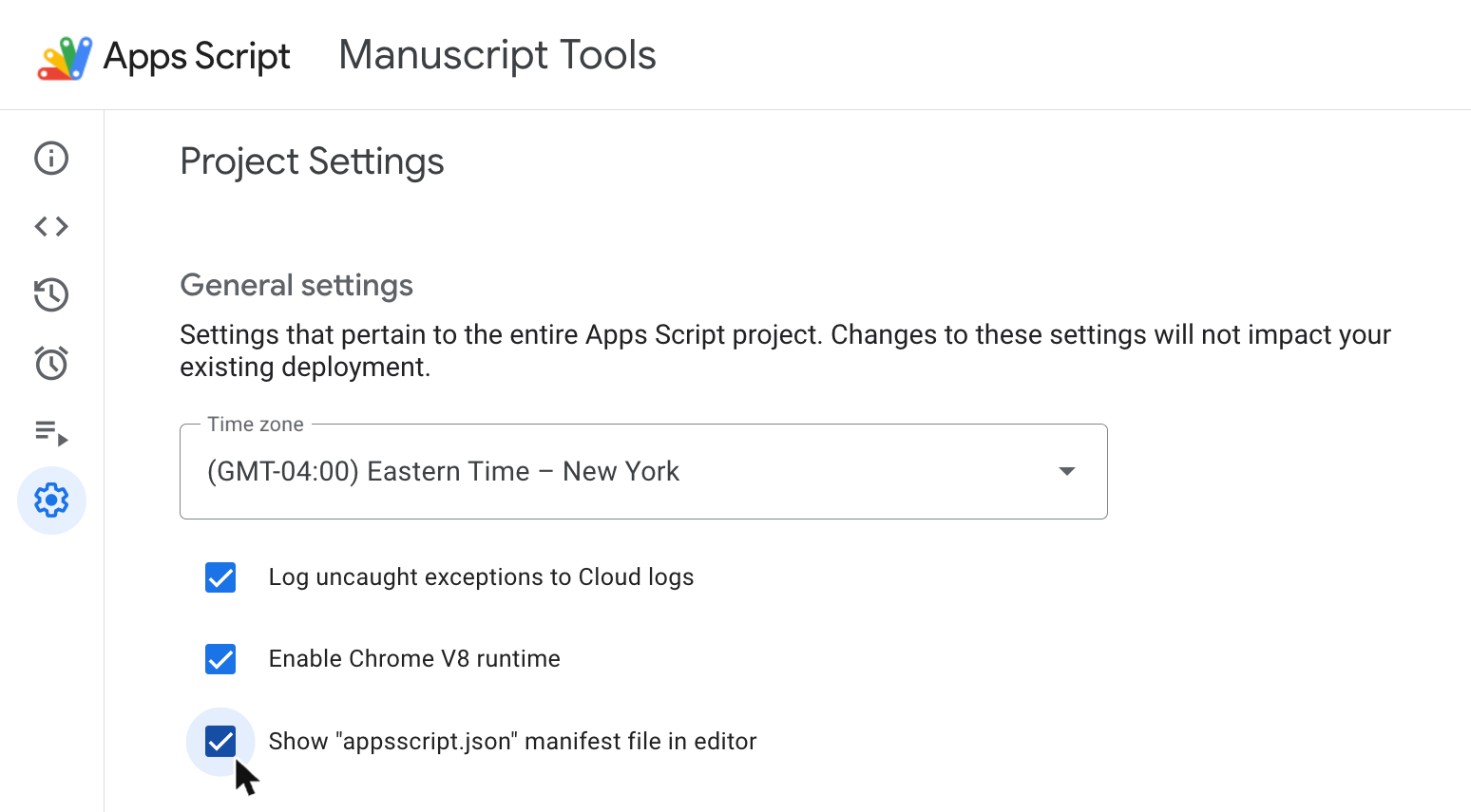
Click the gear icon on the left to open Project Settings, tick Show "appsscript.json" manifest file in editor, then click the < > icon to go back to the editor.
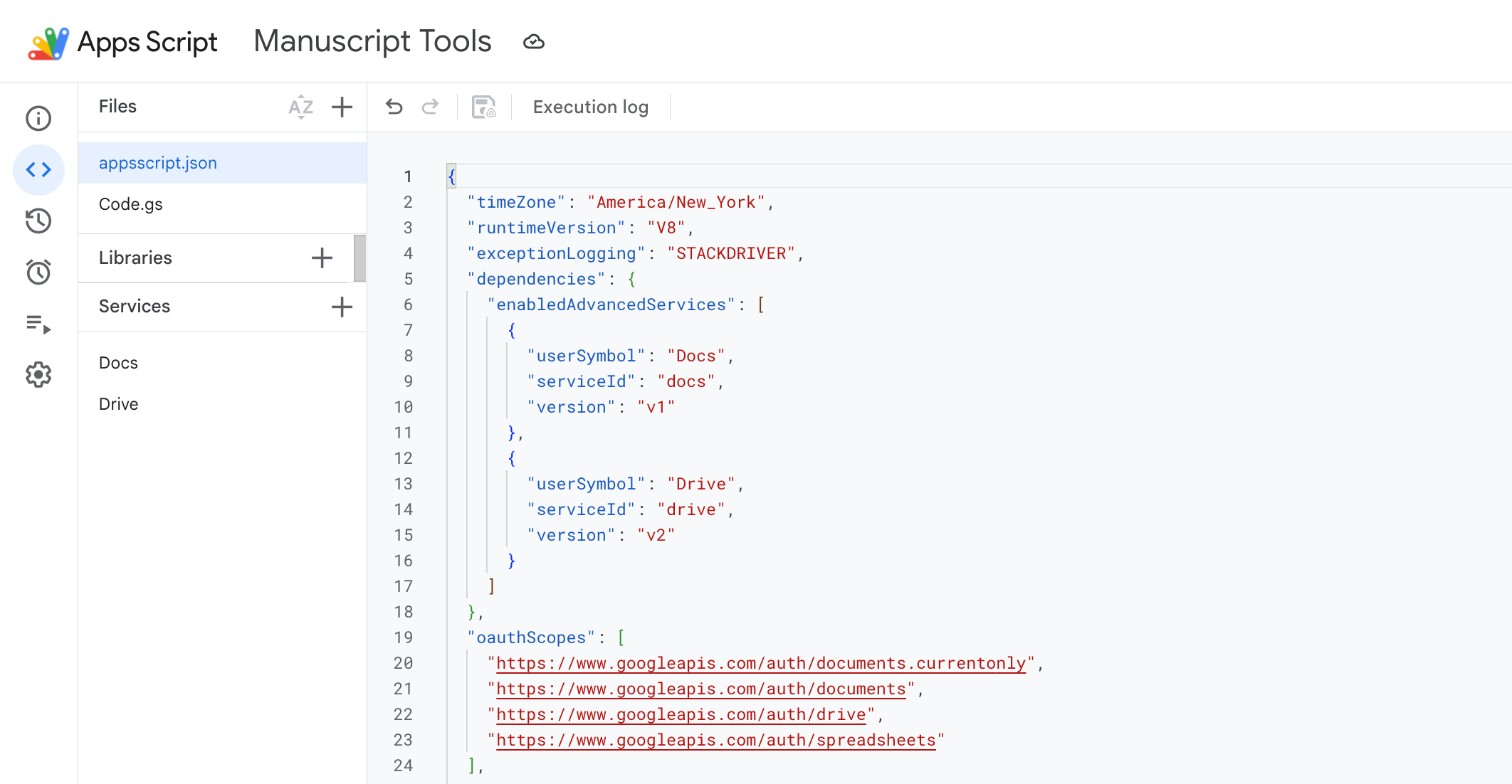
Click appsscript.json in the file list, select everything in
it, and replace it with the contents of the downloaded
appsscript.json. Click the save icon. Docs and
Drive then appear under Services, which means the manifest
worked.
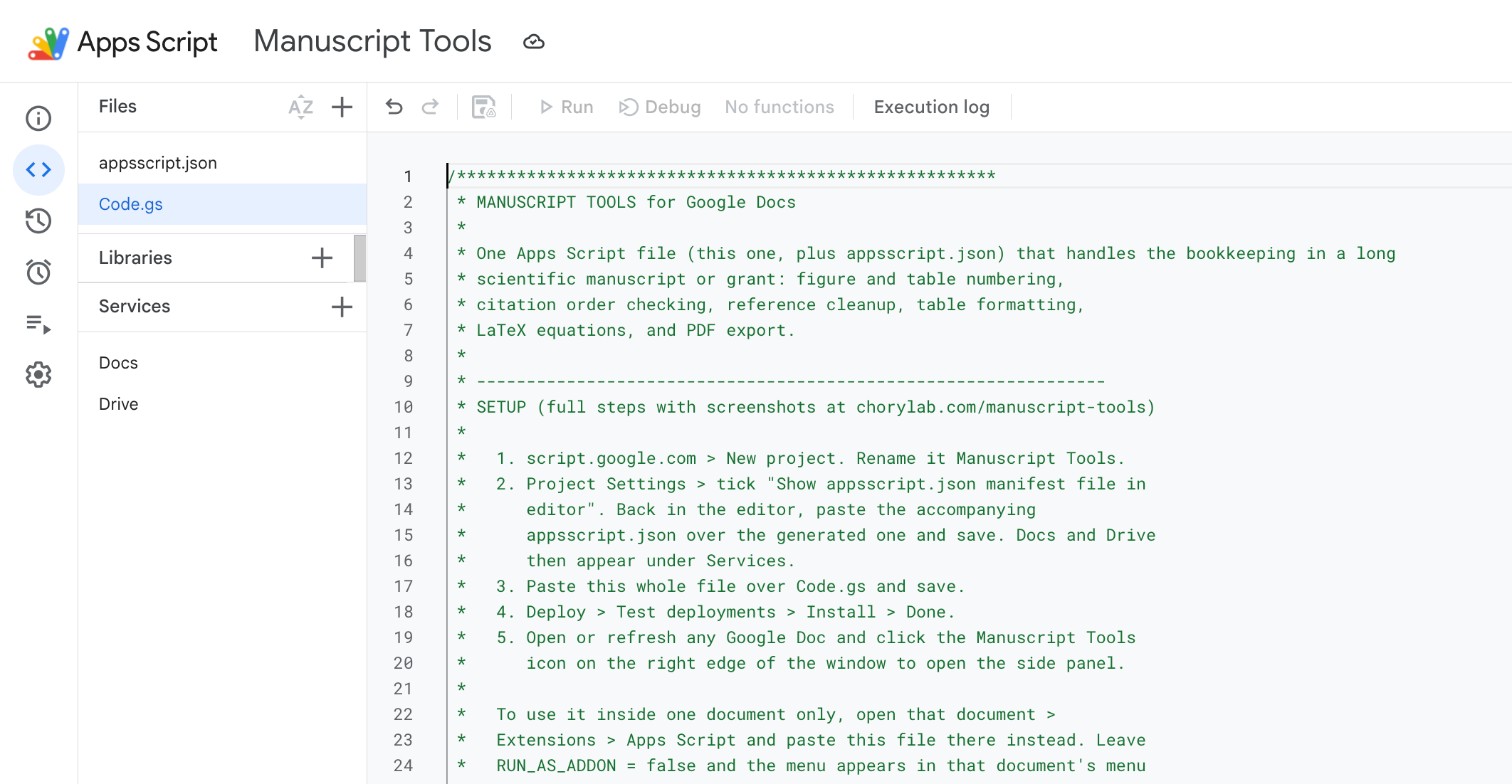
Click Code.gs, delete the few lines already there, and paste
in the whole downloaded Code.gs. It is one long file of about
8,000 lines, so make sure you copied all of it. Click the save icon.
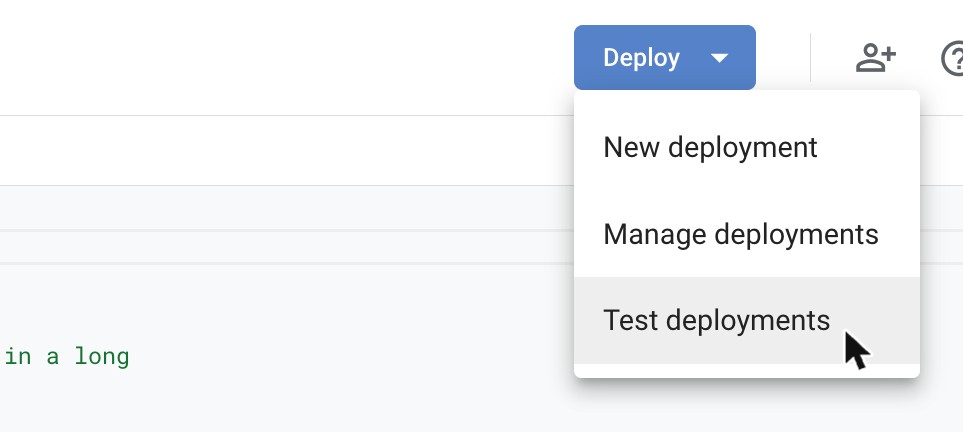
Click the arrow on the blue Deploy button and choose Test deployments. Do not choose New deployment.
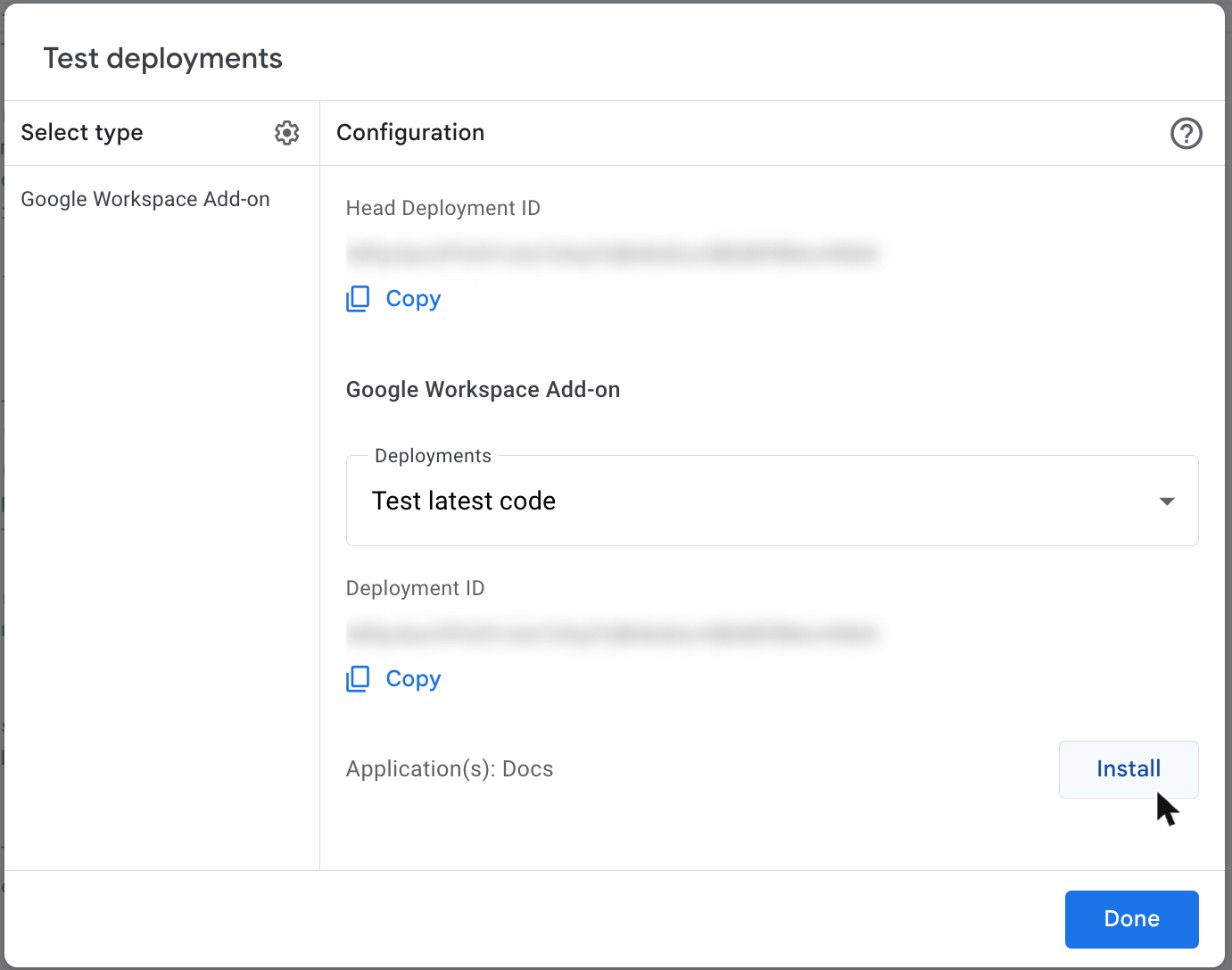
In the dialog that opens, click Install, then Done.
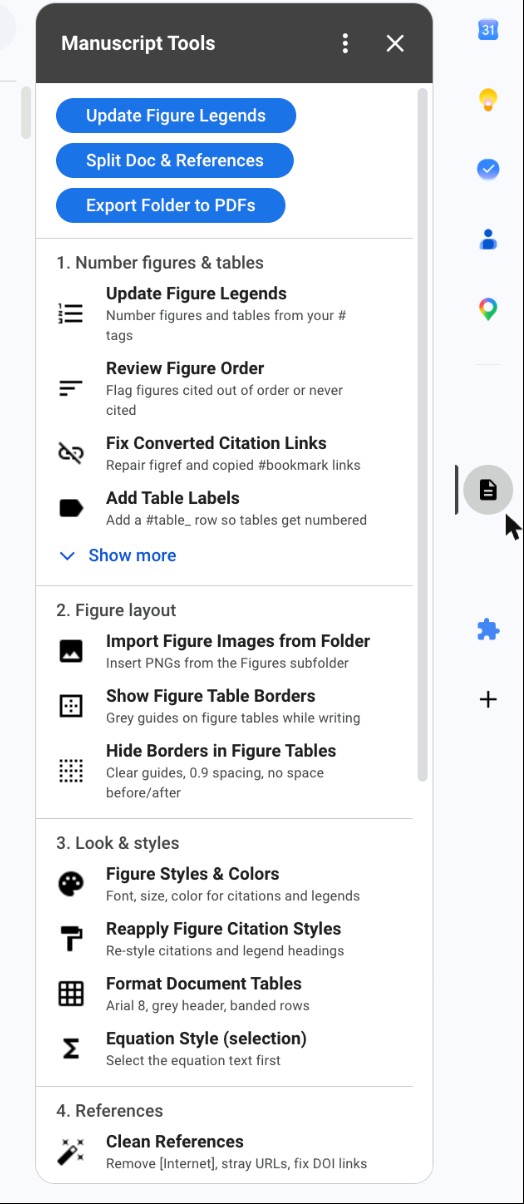
Open any Google Doc, or refresh one that is already open. Click the Manuscript Tools icon in the strip of icons on the right edge of the window to open the panel.
The first time you use a tool, Google asks for permission. Because the add-on is not published in Google's Marketplace, it shows a warning that Google has not verified the app. This is expected, since you are approving code you installed in your own account. Click Advanced, then Go to Manuscript Tools (unsafe), then Allow. You only do this once.
Numbering comes from hashtags you type as plain text. Each tag is a word, an underscore, and a key that names the item. The tag at the start of a legend names the item, and the tag in your text cites it.
The rule. In the legend, the tag word is 4 or more letters. In the text, the citation is exactly the first 3 letters of that word, followed by the same key. Each 3-letter code can belong to only one kind of item in a document.
| Item | In the legend 4+ letters | In the text first 3 letters | It becomes |
|---|---|---|---|
| Figure | #figure_westernblot | #fig_westernblot | Figure 1) and (Fig. 1) |
| Table | #table_primers | #tab_primers | Table 1) and (Tab. 1) |
| Supplemental figure | #suppfigure_rawgels | #sup_rawgels | Supplemental Figure 1) and (Supp Fig. 1) |
| Supplemental table | #stable_reagents | #sta_reagents | Supplemental Table 1) and (Supp Tab. 1) |
| Supplemental equation | #sequation_kinetics | #seq_kinetics | Supplemental Equation 1) and (Supp Eq. 1) |
Figures, tables and supplemental figures work straight away. For anything
else, pick a word whose first 3 letters are not already taken.
#supptable_ would not work next to #suppfigure_,
because both start with sup and the document cannot tell them
apart, so use #stable_, which gives sta. Spelling
variants of one word are fine, so #table_, #tabl_
and #tables_ all number together as tab.
The first time you use a new word whose first 3 letters are free,
Update Figure Legends adds it for you. #equation_x
becomes Equation 1) and #equ_x becomes (Eq. 1), with no setup. Only
when two different words share the same 3 letters does it open
Review Tag Vocabulary so you can choose. You can change any
legend heading or in-text prefix there afterwards. A 3-letter tag word is always
read as a citation, and a tag word of 1 or 2 letters is skipped.
Panel letters go after a dash, so #fig_westernblot-BC becomes
(Fig. 1B-C). Items are numbered in the order their legends appear, so to
renumber you move the legend and run Update Figure Legends
again. Then run Review Figure Order to see whether anything is
cited out of sequence, as shown below.
Use descriptive keys such as westernblot rather than
fig2, because the number changes as you write and the key does
not. The panel's Help / User Guide covers every tool.
To try it on a real document, make your own copy of the manuscript template from our BME406 course. It already uses the figure and table tags, so you can run every tool on it straight away.
Copy the manuscript templateMost journals and reviewers expect Figure 1 to be the first figure cited, Figure 2 the second, and so on. After running Update Figure Legends, run Review Figure Order. It lists every figure in the order it is first cited, shows the number each one should have, and marks the ones that need to move. It also lists any figure that has a legend but is never cited in the text.
In this draft the qPCR time course is cited first, but its legend is second, so Review Figure Order marks both the qPCR and the western blot figures to move. It also reports that the pilot imaging figure has a legend but is never cited.
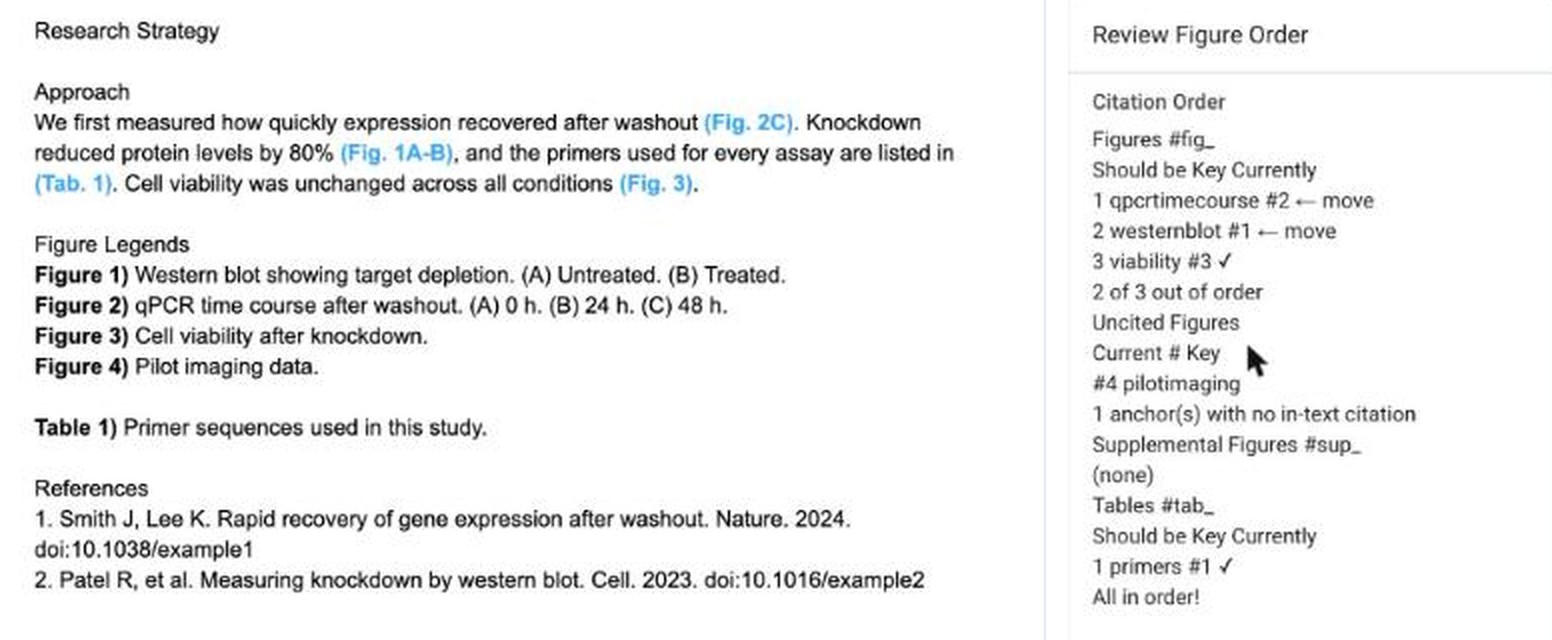
Move the qPCR legend above the western blot legend, and delete or cite the unused figure. Then run Update Figure Legends again. Every legend and every in-text citation is renumbered to match, including panel letters, and Review Figure Order reports that everything is in order.
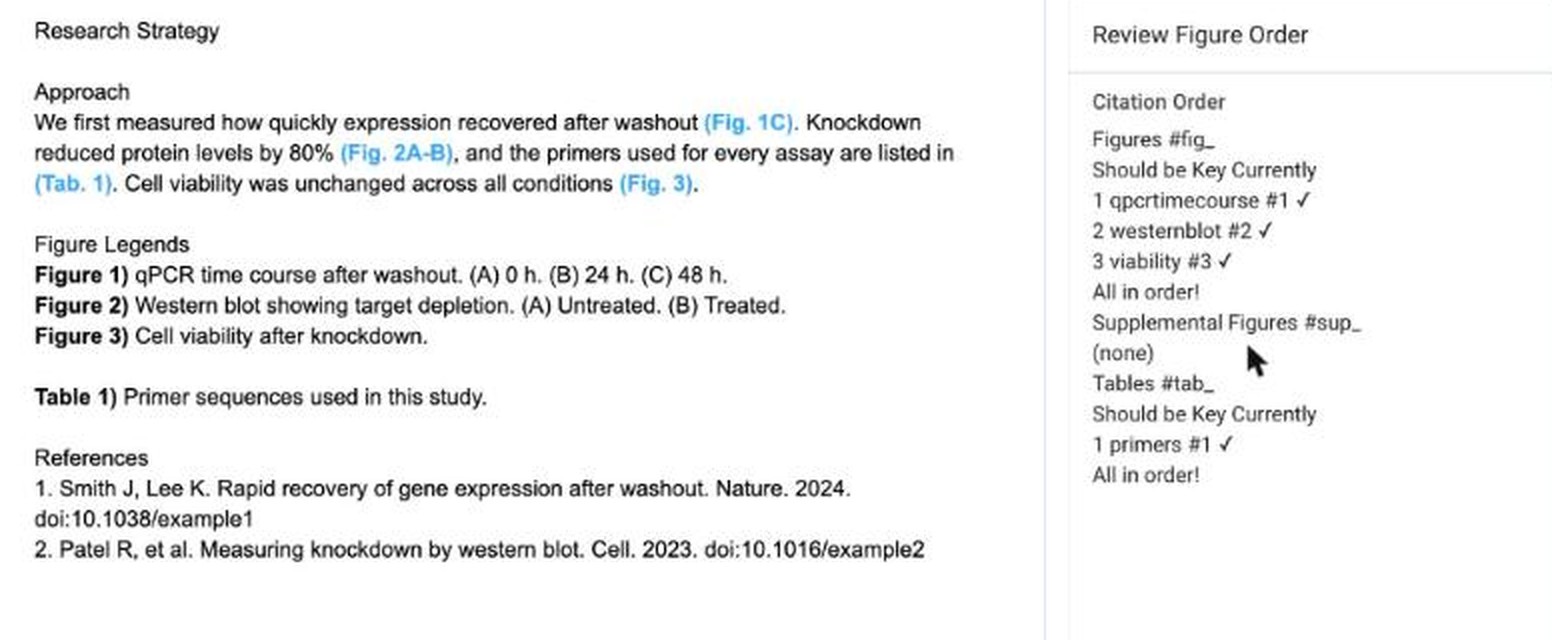
When a section is ready to upload, open it and click Split Doc & References at the top of the panel. The References heading must be on a line by itself. The tool never edits your document. It works on temporary copies, moves them to the trash when it is done, and reports how many links it removed from each PDF.
The PDFs are saved in a folder named [PDFs] plus the name of the folder your
document is in. A document called Research Strategy gives
Research Strategy - Main.pdf and References.pdf, and
running it again after more edits replaces them with fresh copies.
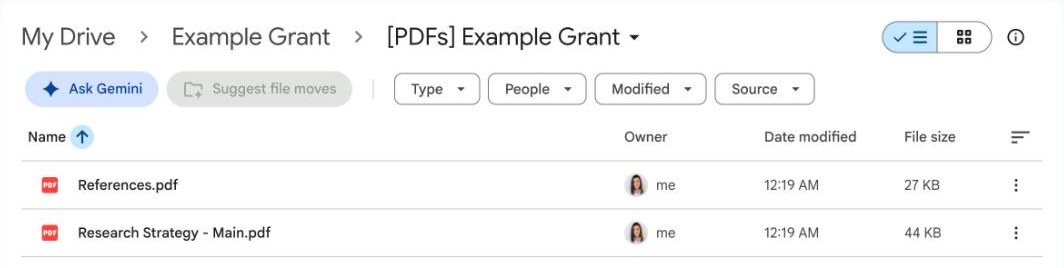
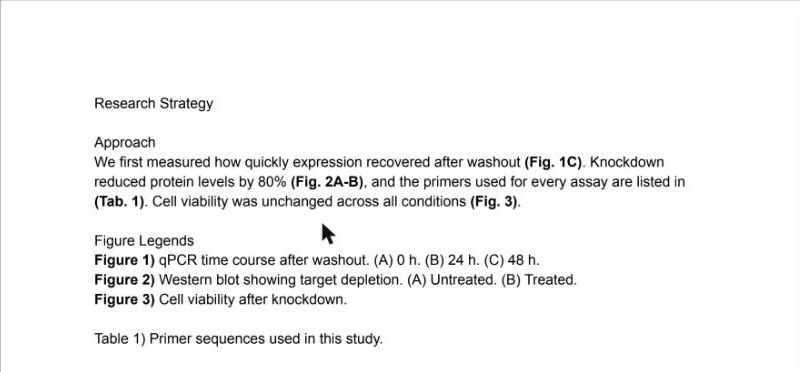
The main PDF stops before the references, and the figure citations are plain bold text rather than links. The tool checks both the document copy and the finished PDF, and tells you if any link could not be removed.
For an application with many parts, put each part in its own Google Doc in one folder, open any of them, and click Export Folder to PDFs. Every Google Doc in that folder is exported to the same [PDFs] folder with its links removed. Big folders run in rounds because Google limits each click to 30 seconds, so keep clicking Continue until the panel says it is done.
When a new version is posted here, download it, paste each file over the old one in your Apps Script project, save, and reload your Doc. You do not need to install again. To remove the add-on, open the project and choose Deploy > Test deployments > Uninstall.
A personal Google account works without any extra setup. A university or company account may block apps that Google has not verified. If the permission screen will not let you continue, ask your IT group or use a personal account.
appsscript.json in again and save,
and check that Docs and Drive are listed under Services.Last updated 2 November 2026.